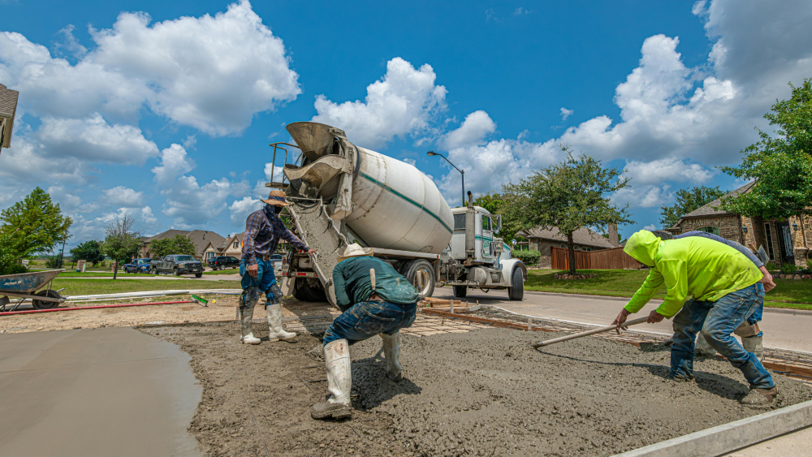
A concrete job is only as good as its setup. That’s true whether you’re pouring a commercial slab in Sonoma County, setting ADA curb ramps for a Solano County municipality, or anchoring rebar into an existing foundation in Mendocino County.
Most concrete problems, bowed forms, out-of-square slabs, failed inspections, anchor pull-outs, trace back to decisions made before the truck rolled in: what concrete supplies were on the truck, whether the right contractor supplies were in hand, and whether the team behind the counter knew what the job required.
This guide covers the full lifecycle of a commercial concrete job, from choosing a supplier to final inspection sign-off. Each section links to a deeper resource for contractors who want more detail on a specific stage.
Before any field work starts, you need a supplier you can count on. That sounds simple. In practice, there’s a real gap between a supplier who takes your order and one who helps you run a better job.
Commercial concrete work across the North Bay moves fast. Schedules tighten, quantities shift, and a pour that was set for Tuesday gets pushed to Monday because another trade cleared early. In those moments, your supplier’s response time and inventory depth matter as much as the materials themselves.
When you’re evaluating concrete supply companies, whether you’re working in Marin, Solano, or anywhere in the Bay Area, ask these before you commit:
Most commercial concrete jobs require a coordinated set of materials across prep, placement, curing, and protection. (When those materials come from the same knowledgeable source), the crew spends less time coordinating and more time working.
Concrete supplies commonly needed on a single commercial job:
A supplier who carries all of these, and understands how they interact, saves you from running to three different vendors in the middle of a pour week. And one who knows Bay Area projects understands the schedule pressure, the regional regulations, and the specific conditions that come with work in Sonoma, Solano, Marin, and Mendocino Counties.
Once you’ve sourced your materials, the clock starts on getting forms set accurately before the pour. The right contractor supplies on the truck let your crew move through each stage (layout, stake driving, securing, and site safety) without unnecessary stops or workarounds. (These 7 tools cover the full workflow), and all are available at Stevenson Supply.
Steel and iron stakes drive straighter, pull cleaner, and hold better in tough ground than wood. Match stake size to your form board height and soil conditions. Drive at consistent intervals, spacing too far apart is one of the most common causes of form bow during a pour. Available in bundle quantities for contractor pickup.
Match weight to your stake gauge and soil type. The right sledgehammer lets you drive efficiently without overswinging, which protects the stake cap and the form board behind it. Keep the cap clean, angle the stake slightly toward the board when driving, and use controlled strikes in hard ground.
Stevenson carries digging bars with both breaker and tamper ends. Use the breaker end to fracture compacted soil or rock before driving stakes. In hard North Bay ground, a 60-second pass with the digging bar ahead of the sledgehammer prevents bent stakes, split boards, and layouts that need resetting.
String line is how you keep forms straight across long runs. A form board that looks right by eye can be off by 1/4 inch over 20 feet, and that shows up in the finished slab edge. Pull the line tight between batter boards before any form boards go down. Nylon holds tension better than cotton in wet conditions.
Available in multiple colors, lumber crayons and markers keep layout readable on rough lumber, metal stake faces, and concrete subgrade. Use them to mark cut lines on form boards, note grade references on stake faces, and color-code pour sections when multiple stages are being formed at once.
Tie wire keeps rebar chairs, wire mesh laps, and form hardware in position through the pour. It’s also the item that tends to run out mid-job. A wire twister speeds up connections considerably on large rebar mats.
OSHA 1926.701(b) requires mushroom-style cap tips on all exposed vertical rebar on any site where rebar presents an impalement risk. Cap tips should be in every truck stock, restocked before every concrete job, and checked before any crew walks the site. They’re inexpensive and non-negotiable.
Having the right tools is step one. (Using them in the right sequence) is step two. A lot of pour problems (slabs that don’t drain, edges that drift out of line, forms that blow out mid-pour) start with a form-setting process that skipped one of the fundamentals.
Mark your first corner as the anchor point, then measure and mark the remaining three. Confirm square using the 3:4:5 method: measure 3 feet along one side of a corner and 4 feet along the adjacent side, the diagonal between those marks should be exactly 5 feet. Scale up for larger slabs: 6:8:10 or 9:12:15.
Then measure both diagonals corner-to-corner across the full slab. A truly square layout has equal diagonals. A difference of even 1/4 inch is worth correcting before stakes go in.
Pro Tip: Set batter boards 2–3 feet back from each corner. They let you re-establish corner positions if something gets bumped during staking. Twenty minutes of setup saves hours of re-layout.
Place form boards with the inside face flush to your string line. Drive stakes on the outside of the board, close enough to make solid contact. Spacing:
Drive stakes plumb, a stake driven at an angle pushes the board as it goes deeper. Fasten the board to each stake before moving on.
Once all 4 sides are staked, walk the full perimeter with a Stabila level. Check at every stake: top of board side to side, front to back along each run, and for high or low spots between stakes. To raise a low spot, pack soil under the board or shim between board and stake. To drop a high spot, re-drive the stake slightly deeper.
On slabs larger than 400 square feet, a Spectra or Pro Shot rotating laser and receiver does this work faster than a hand level. Both are available at Stevenson Supply.
Before the truck arrives:
Once a slab or foundation is in place, product decisions shift to anchoring rebar, threaded rod, and structural hardware into existing concrete. (Two systems cover this work) and using the wrong one can mean a re-drill, a failed inspection, or a connection that doesn’t hold under load.
Epoxy anchors use a two-part resin to chemically bond rebar, threaded rod, or dowels into drilled holes. Because load transfers through the bond rather than expansion pressure on the hole walls, epoxy maintains capacity in cracked concrete, allows tighter edge distances, and handles structural applications mechanical anchors can’t.
Epoxy is the right call when:
Epoxy requires clean, dry holes, contaminated or wet boreholes reduce adhesion significantly. On cold NorCal mornings, cure time extends; load the anchor before full cure and you compromise the bond.
Wedge anchors, sleeve anchors, and drop-in anchors grip through expansion and friction against the hole walls. No cure time, set and load without waiting.
Mechanical anchors are the right call when:
Feature | Epoxy Anchors | Mechanical Anchors |
Load transfer | Chemical bond | Friction/expansion |
Cracked concrete | Rated systems available | Generally not recommended |
Edge distance/spacing | Tighter tolerances allowed | Larger margins typically required |
Install speed | Slower — cure time required | Fast — load after torque |
Best application | Structural, rebar, high-load | Non-structural, hardware, brackets |
Adjustability | None — permanent once cured | Some types removable |
In Northern California’s seismic zone, post-installed anchors on inspected jobs often need to meet ICC-ES ratings. Inspectors on municipal work, commercial site improvements, and anything touching public infrastructure will ask what product was used and how it was installed. Confirm the right system before you drill; hole diameter, depth, and cleaning protocol all depend on the anchor system.
On public right-of-way projects across California, (ADA curb ramp compliance is a pass/fail at inspection). Getting it wrong means rework, schedule delays, and a punch list item that can’t be patched.
California’s requirements are stricter than federal minimums. California Building Code Section 11B governs commercial and publicly funded projects. Caltrans Standard Plans A88A/A88B govern state highway work and most federally funded jobs and require a maximum running slope of 6.67% (1:15), tighter than the federal ADA maximum of 8.33% (1:12). Where standards conflict, the stricter one governs. Confirm which standard applies before you form anything.
Every measurement below is a pass/fail threshold. These are not guidelines, they’re inspection criteria.
Measurement | Maximum Allowed |
Running slope (federal ADA) | 8.33% (1:12) |
Running slope (Caltrans A88A/A88B) | 6.67% (1:15) |
Cross slope on ramp surface | 2.0% (1:50) |
Cross slope at top and bottom landings | 2.0% in any direction |
Flare slope (within pedestrian path) | 10.0% |
Counter slope at gutter | 5.0% |
On a 5-foot-wide ramp, a 2% cross slope is just over 1 inch of fall across the full width. Measure carefully. Stabila digital levels are available at both Stevenson locations for accurate pre- and post-pour verification.
Landings: Top and bottom landings each require a minimum 4 ft x 4 ft clear dimension. Direction-change landings require 5 ft x 5 ft. Parked cars, signal poles, and drainage inlets frequently eat into landing space in the field, confirm clear dimensions on-site, not just on plans.
Detectable warning surfaces (DWTs) are required at every curb ramp where a pedestrian access route meets a vehicular way. No exceptions on California public projects. Per ADA and CBC 11B-705:
DWT panels are most often rejected for incorrect depth placement. The 24-inch depth is measured from the back of curb, not from the ramp break point.
Surface finish matters for compliance. A finish that catches a wheelchair wheel or crutch tip fails accessibility review regardless of slope measurements. Broom finish perpendicular to the direction of travel is standard.
Stevenson Supply stocks DuraJoint forming products, W.R. Meadows curing compounds, and Chem-Masters admixtures. For traffic control: Cortina Safety and Dicke Tool cones, Type III barricades, stop/slow paddles, MUTCD-compliant signage, safety vests, and caution tape. Note that your traffic control plan is a separate, pre-approved deliverable on public right-of-way work.
Here are the practical next steps before your next pour.
Safety note: Always wear appropriate PPE when drilling into concrete, respiratory protection for silica dust, eye protection, and hearing protection. Follow Cal/OSHA silica exposure guidelines for any concrete drilling work.
Stevenson Supply & Tractor Co. has been serving general contractors, land developers, municipal agencies, and civil engineers across the North Bay since 1908. Four generations of the Stevenson family have built the company on product knowledge, dependable service, and practical guidance that makes a difference on real jobsites.
What Stevenson Supply stocks for concrete and commercial contractor work:
Two locations open early:
If your next job involves commercial concrete work anywhere in the North Bay, Stevenson Supply has what you need and a team that can help you figure out exactly what that is before you mobilize.
Call us, stop by, or submit an estimate request online. We’ll confirm availability, answer product questions, and help you get to the job ready.
Reach out to Stevenson Supply & Tractor Co today!
📞 Call us: (707) 575-3335
Look beyond product availability. The most useful suppliers answer questions about how products work together, communicate clearly about delivery timing, and carry the full range of concrete supplies a commercial job needs (forming hardware, repair products, curing compounds, sealers, and accessories) not just the main material. Local knowledge of Bay Area schedule pressures and regional regulations adds value that a regional distributor or big-box retailer can’t match.
The core set: steel or iron form stakes in bundle quantities, a sledgehammer matched to the stake gauge and soil type, a digging bar with breaker and tamper ends, nylon string line, lumber crayons, tie wire, and rebar guard cap tips. These 7 items cover the full form-setting workflow. Running short on any one of them mid-job costs more time than a supply run before mobilizing.
Concrete condition is usually the deciding factor. Mechanical anchors work through expansion and friction, they perform well in solid, uncracked concrete for non-structural connections but lose capacity in cracked material. Epoxy anchors bond chemically to the concrete matrix and maintain capacity in cracked concrete, tighter edge conditions, and structural applications. On any inspected job, confirm the anchor type, embedment depth, and product category against the structural drawings or ICC-ES requirements before drilling.
Most failures trace to slope measurements exceeding allowed tolerances, landings that don’t meet the 4 ft x 4 ft clear minimum, and detectable warning tile placed at the wrong depth from the back of curb. A common missed issue: using the federal ADA 8.33% running slope maximum on a Caltrans project, which requires a stricter 6.67%. Verify your governing standard before forming, correcting a slope after the pour sets is expensive.
Both. Stevenson Supply delivers concrete supplies, contractor supplies, and related materials throughout Sonoma, Solano, Marin, and Mendocino Counties. Contact the sales team for delivery scheduling and minimum order details. Both stores also open early for contractors loading before a morning pour: Santa Rosa at 6:30 AM, Vallejo at 5:30 AM.
For concrete and contractor work, Stevenson stocks DuraJoint (forming), W.R. Meadows (curing and accessories), Chem-Masters (concrete chemicals), Kraft Tool (concrete hand tools), ADA Tile (detectable warning panels), Stabila (levels), Spectra, Topcon, and Pro Shot (lasers), Aervoe (marking paint), Cortina Safety and Dicke Tool (traffic control), and Simpson Strong-Tie (structural connectors), among others. Call or stop by to confirm availability for your specific job.

President/CEO
Kent Stevenson is the owner and president of Stevenson Supply & Tractor Co., a family-owned equipment and supply company serving Sonoma County and the North Bay agricultural community since 1967. Under Kent’s leadership, the company has expanded from a small tractor dealership into a trusted regional provider of agricultural equipment, hardware, fencing, and repair services.
Kent is known for his deep agricultural knowledge, hands-on approach, and commitment to serving the local farming and vineyard community. His business philosophy blends old-fashioned service with modern efficiency, ensuring every customer—from homeowners to commercial growers—receives honest guidance and reliable equipment solutions.
Stevenson Supply continues to reflect the values Kent grew up with: hard work, integrity, and dedication to supporting the people who keep Sonoma County growing.